
 In additional to writing, one of my favorite means of honoring the Gods is through the construction of portable shrines. I find the activity simultaneously relaxing and energizing, uplifting and inspiring. For me, it is a way to engage more directly with the Gods: I study their myths and symbols and associations and craft a single, unique expression of my devotion to that Deity or group of Deities.
Such shrines are relatively easy to construct. It just requires a bit of research, some silent reflection, patience, time, and craft supplies. Most of these supplies are inexpensive, too (though feel free to use more expensive pieces if called to do so). These shrines can serve multiple purposes. You can take them with you when you travel (hence, portable). Additionally, they work for devotees who have limited space, or who have pets, or sneaky roommates, or who change out their main sacred space for seasonal holy days; the shrines can be brought out as needed, and then safely stowed away.
You can make as many of these shrines as you feel called to create. This can done at any time, or as part of holy day celebrations, either alone or with a group. These can also be a great way to introduce children to the Gods, allowing them to create their own sacred space. Nor do the shrines have to be for “just” the Gods; why not make one for a particular hero or one of the Mighty Dead or your collective ancestors? Or, create one for a particular sacred day — such as Samhain or Walpurgisnacht or Deipnon — and bring it out each time you celebrate.
 Below, I have laid out the supplies and construction of a portable shrine in honor of al-Lat, which I built after Her great lion statue was destroyed by Da’esh in Autumn 2015. Use this as a jumping off point in the construction of your own shrine to the Deity of your choice: Odin, Papa Legba, Brighid, Pele, Horus, Lakshmi, whomever you are called to honor.
Supplies
one wooden, hinged box (readily available at craft stories such as Michael’s, Hobby Lobby, AC Moore, and others; the boxes vary in size and design; in the case of the shrine for al-Lat, I chose one that looked like a small book)
sand paper
paint (colors dependent on the Deity)
beads and beading wire or thread
charms
flowers and leaves (dried or paper)
Deity image
brushes
glue
bowl of water
paper towels or cloth
scissors
Constructing the Shrine
1) Sand the wooden box to remove any rough edges. Wash clean with a slightly damp cloth.
2) Apply the paint/s of your choice to the exterior of the box. In the case of the shrine to al-Lat, I painted the exterior a soft bronze, and the “pages” a mixture of antique gold, brown, and copper to give it an aged, mottled appearance. Allow the paint to dry completely, adding extra coats as needed.
3) Paint the interior of the box. I usually choose a different color, one which contrasts with the exterior paint color. For the al-Lat shrine, I used black. Alternatively, you may wish to line the interior with craft paper, tissue paper, or fabric; if so, super glue or modge podge work well; just be sure to allow them to dry, and wash off the brush thoroughly after applying the fixing agent.
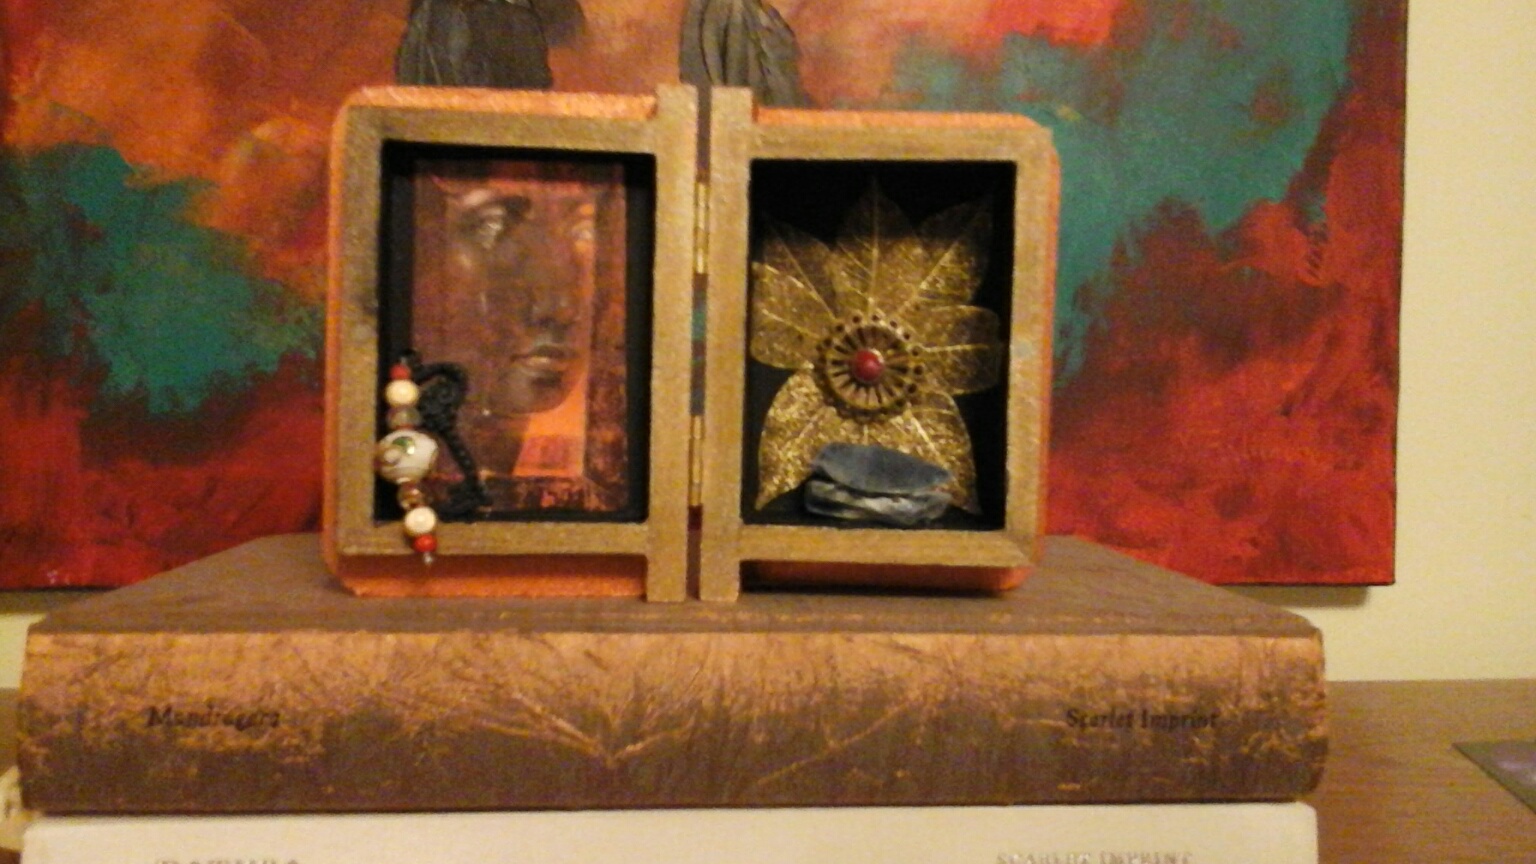
 4) Arrange the beads, charms, flowers, Deity image, and any other items. Play around with the arrangement a few times until you find something you like. If necessary, trim the Deity image to fit the box. Images can come from almost any source: magazines, children’s books, mythology encyclopedias, old Tarot decks, or even printed off the internet. For the al-Lat shrine, I actually used the image of Persephone from Susan Seddon Boulet’s Goddess Knowledge Cards. However, while the artist intended the image to represent a Greek Goddess, in that moment, I saw a weeping al-Lat, mourning the loss of her lion and the destruction of so many sacred sites, and the horror visited upon her people. I also selected an assortment of white, yellow, gold, and red beads, as well as golden leaves to represent the desert sun; and I created an “altar” of blue stones, to represent both the desert sky and the altars of ancient times and today — altars which must be rebuilt. After settling on an arrangement I liked, I glued down the leaves and image and altar stones, then threaded the beads and hung them from a black key which I also glued to the interior. Allow everything to dry, with the box open.
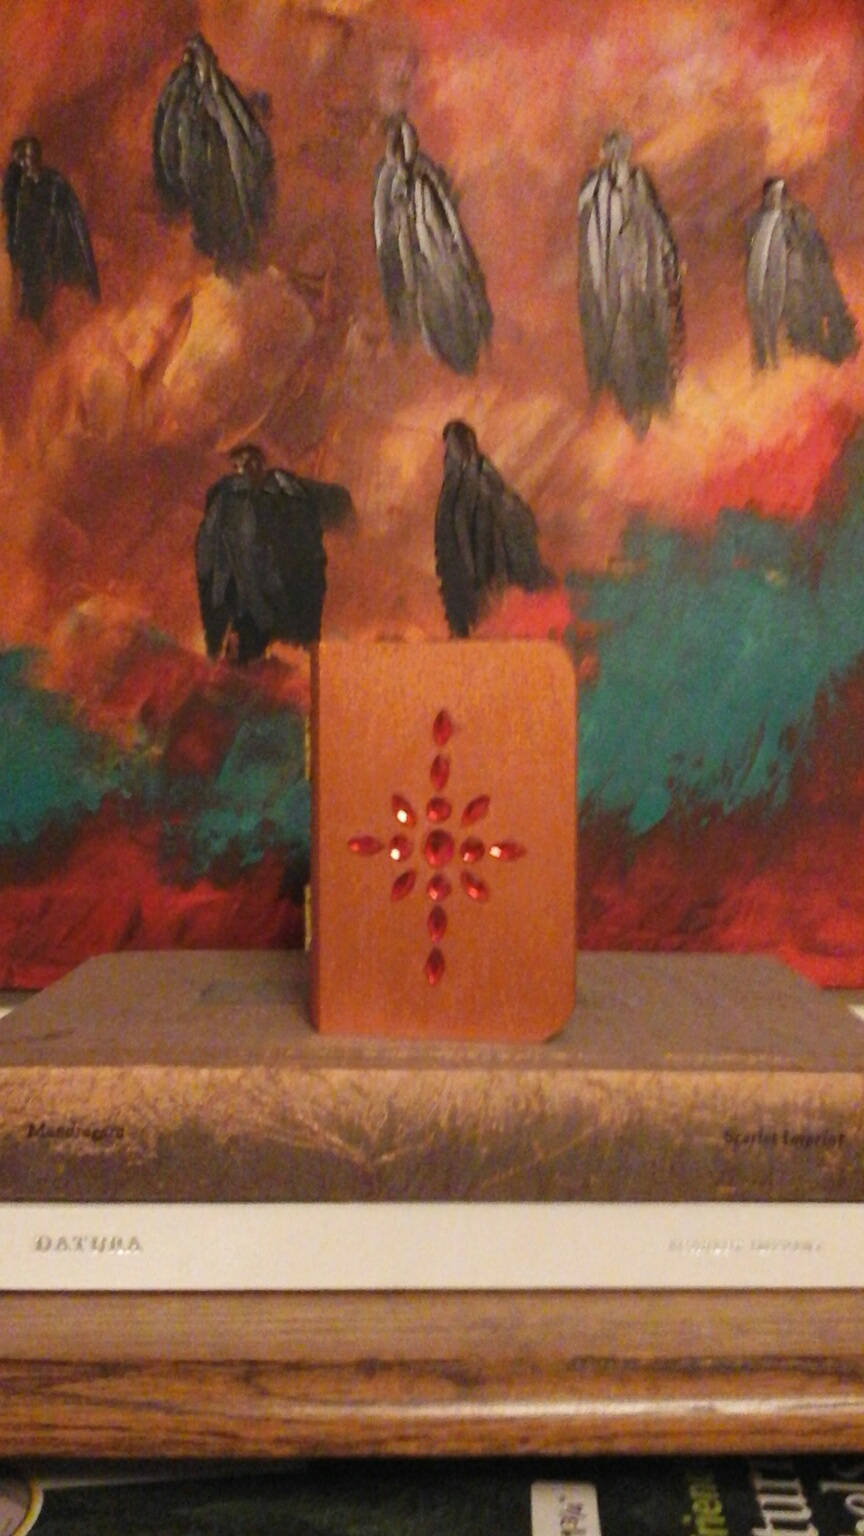
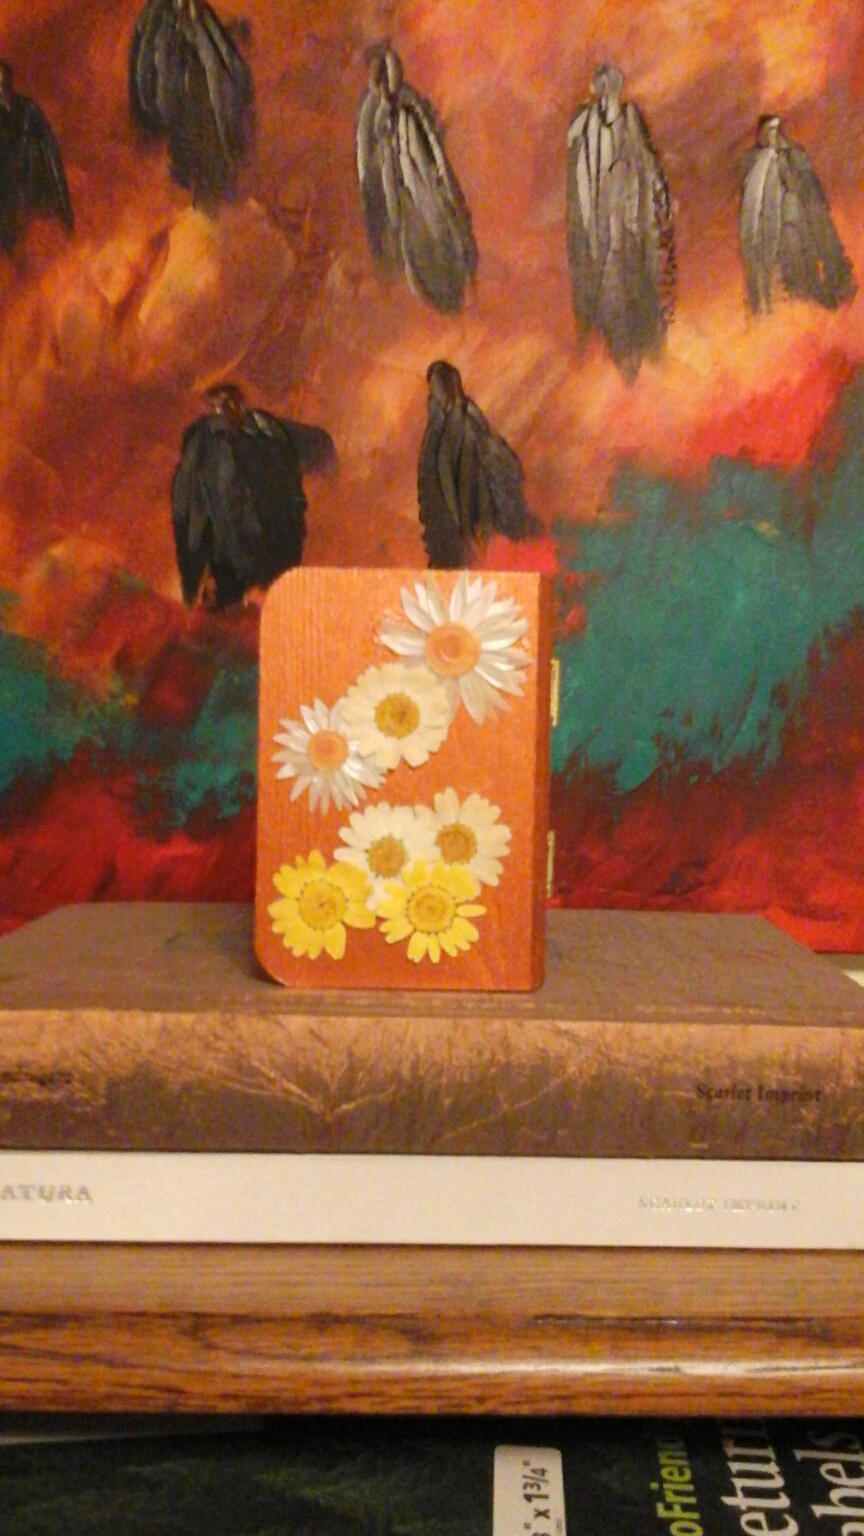
5) Affix decorations to the exterior of the box. Again, choose pieces which represent the Deity, and those qualities associated with him/her/hir. In the case of al-Lat, I used super glue to apply red jewels in a sunburst pattern on the front of the shrine. I also applied dried white and yellow flowers to the back.
6) After everything has dried thoroughly, look over the portable shrine to make sure that it is complete. It may be that you will continue to add pieces to the shrine as you are called to do so. That’s fine. I do recommend, though, that you sanctify the portable shrine. If you have a main altar, either to that Deity or to your household pantheon, leave the portable shrine there. Make an offering to the Deity/ies, and dedicate the shrine to him/her/hir. If you do not have a main altar, still do the dedication according to your tradition.
[Rebecca Buchanan is the editor of EHS.]
